参考 《C和C++游戏趣味编程》 童晶
“旋转蛇”错觉
绘制错觉图片,使静止的圆盘看起来有在转动的错觉
绘制扇形
函数solidpie(left, top, right, bottom, stangle, endangle)可以绘制无边框的填充扇形。其中(left, top)、(right, bottom)为扇形对应圆的外切矩形的左上角、右下角坐标,stangle、endangle为扇形的起始角、终止角(单位为弧度)
- #include <graphics.h>
- #include <conio.h>
- #include <stdio.h>
-
- int main()
- {
- float PI = 3.14159;
- initgraph(600, 600);
- int centerX = 300;
- int centerY = 300;
- int radius = 200;
- circle(centerX, centerY, radius); // 画出对应的圆边框
- int left = centerX - radius; // 圆外切矩形左上角x坐标
- int top = centerY - radius; // 圆外切矩形左上角y坐标
- int right = centerX + radius; // 圆外切矩形右下角x坐标
- int bottom = centerY + radius; // 圆外切矩形右下角y坐标
- solidpie(left, top, right, bottom, PI / 6, PI / 3); // 画出填充扇形
- _getch();
- closegraph();
- return 0;
- }
RGB颜色模型
EasyX可以设定绘图颜色:
- setbkcolor(WHITE); // 设置背景颜色为白色
- setlinecolor(RED); // 设置线条颜色为红色
- setfillcolor(GREEN); // 设置填充颜色为绿色
- cleardevice(); // 以背景颜色清空画布
也可以采用数字形式:
- setbkcolor(RGB(255, 255, 255)); // 设置背景颜色为白色
- setlinecolor(RGB(255, 0, 0)); // 设置线条颜色为红色
- setfillcolor(RGB(0, 255, 0)); // 设置填充颜色为绿色
绘制一组扇形单元
人脑处理高对比度颜色(如黑和白)的时间,要比处理低对比度颜色(如红与青)短很多。我们会先感知到黑白图案,后感知到红青图案,这个时间差会让图片产生相对运动的效果,所以我们会有图片的错觉
为了进一步强化这种错觉,我们让每个黑、白扇形的角度为PI/60,红、青扇形的角度为PI/30。一组青、白、红、黑扇形角度和为PI/10,逆时针依次绘制20组单元
- #include <graphics.h>
- #include <conio.h>
- #include <stdio.h>
-
- int main()
- {
- float PI = 3.14159;
- initgraph(600, 600);
- setbkcolor(RGB(128, 128, 128)); // 设置背景颜色为白色
- cleardevice(); // 以背景颜色清空画布
-
- int centerX = 300;
- int centerY = 300;
- int radius = 200;
- int left = centerX - radius; // 圆外切矩形左上角x坐标
- int top = centerY - radius; // 圆外切矩形左上角y坐标
- int right = centerX + radius; // 圆外切矩形右下角x坐标
- int bottom = centerY + radius; // 圆外切矩形右下角y坐标
-
- int i;
- float offset;
- for (i = 0; i < 20; i++)
- {
- offset = i * PI / 10;
- setfillcolor(RGB(0, 240, 220)); // 青色
- solidpie(left, top, right, bottom, offset, 2 * PI / 60 + offset);
- setfillcolor(RGB(255, 255, 255)); // 白色
- solidpie(left, top, right, bottom, 2 * PI / 60 + offset, 3 * PI / 60 + offset);
- setfillcolor(RGB(200, 0, 0)); // 红色
- solidpie(left, top, right, bottom, 3 * PI / 60 + offset, 5 * PI / 60 + offset);
- setfillcolor(RGB(0, 0, 0)); // 黑色
- solidpie(left, top, right, bottom, 5 * PI / 60 + offset, 6 * PI / 60 + offset);
- }
- _getch();
- closegraph();
- return 0;
- }
循环嵌套
利用双重for循环语句,可以绘制出多层圆盘。先绘制半径大的,在绘制半径小的覆盖。不同半径的扇形之间有PI/20的角度偏移量。另外,对圆心坐标进行循环遍历就可以实现多个圆盘效果
- #include <graphics.h>
- #include <conio.h>
- #include <stdio.h>
-
- int main()
- {
- float PI = 3.14159;
- initgraph(1200, 800);
- setbkcolor(RGB(128, 128, 128)); // 设置背景颜色为灰色
- cleardevice();
-
- int centerX, centerY;
- int radius;
- int i;
- float offset;
- float totalOffset = 0; // 不同半径之间的角度偏移量
-
- for (centerX = 200; centerX < 1200; centerX += 400)
- {
- for (centerY = 200; centerY < 800; centerY += 400)
- {
- for (radius = 200; radius > 0; radius -= 50)
- {
- int left = centerX - radius;
- int top = centerY - radius;
- int right = centerX + radius;
- int bottom = centerY + radius;
- for (i = 0; i < 20; i++)
- {
- offset = i * PI / 10 + totalOffset;
- setfillcolor(RGB(0, 240, 220)); // 青色
- solidpie(left, top, right, bottom, offset, 2 * PI / 60 + offset);
- setfillcolor(RGB(255, 255, 255)); // 白色
- solidpie(left, top, right, bottom, 2 * PI / 60 + offset, 3 * PI / 60 + offset);
- setfillcolor(RGB(200, 0, 0)); // 红色
- solidpie(left, top, right, bottom, 3 * PI / 60 + offset, 5 * PI / 60 + offset);
- setfillcolor(RGB(0, 0, 0)); // 黑色
- solidpie(left, top, right, bottom, 5 * PI / 60 + offset, 6 * PI / 60 + offset);
- }
- totalOffset += PI / 20; // 不同半径间角度偏移
- }
- }
- }
- _getch();
- closegraph();
- return 0;
- }
HSV颜色模型
HSV是一种根据颜色的直观特性创建的颜色模型。H是Hue的首字母,表示色调,取值范围为0360,刻画不同色彩;S是Saturation的首字母,表示饱和度,取值范围为01,表示混合了白色的比例,值越高颜色越鲜艳;V是Value的首字母,表示明度,取值范围为0~1,等于0时为黑色,等于1时最明亮
- #include <graphics.h>
- #include <conio.h>
- #include <stdio.h>
-
- int main()
- {
- float PI = 3.14159;
- initgraph(600, 600);
- setbkcolor(RGB(255, 255, 255));
- cleardevice();
-
- int centerX = 300;
- int centerY = 300;
- int radius = 200;
- int left = centerX - radius;
- int top = centerY - radius;
- int right = centerX + radius;
- int bottom = centerY + radius;
-
- int i;
- int step = 10;
- COLORREF color;
- for (i = 0; i < 360; i += step)
- {
- color = HSVtoRGB(i, 1, 1); // HSV设置的颜色
- setfillcolor(color);
- solidpie(left, top, right, bottom, i * PI / 180, (i + step) * PI / 180);
- }
- _getch();
- return 0;
- }
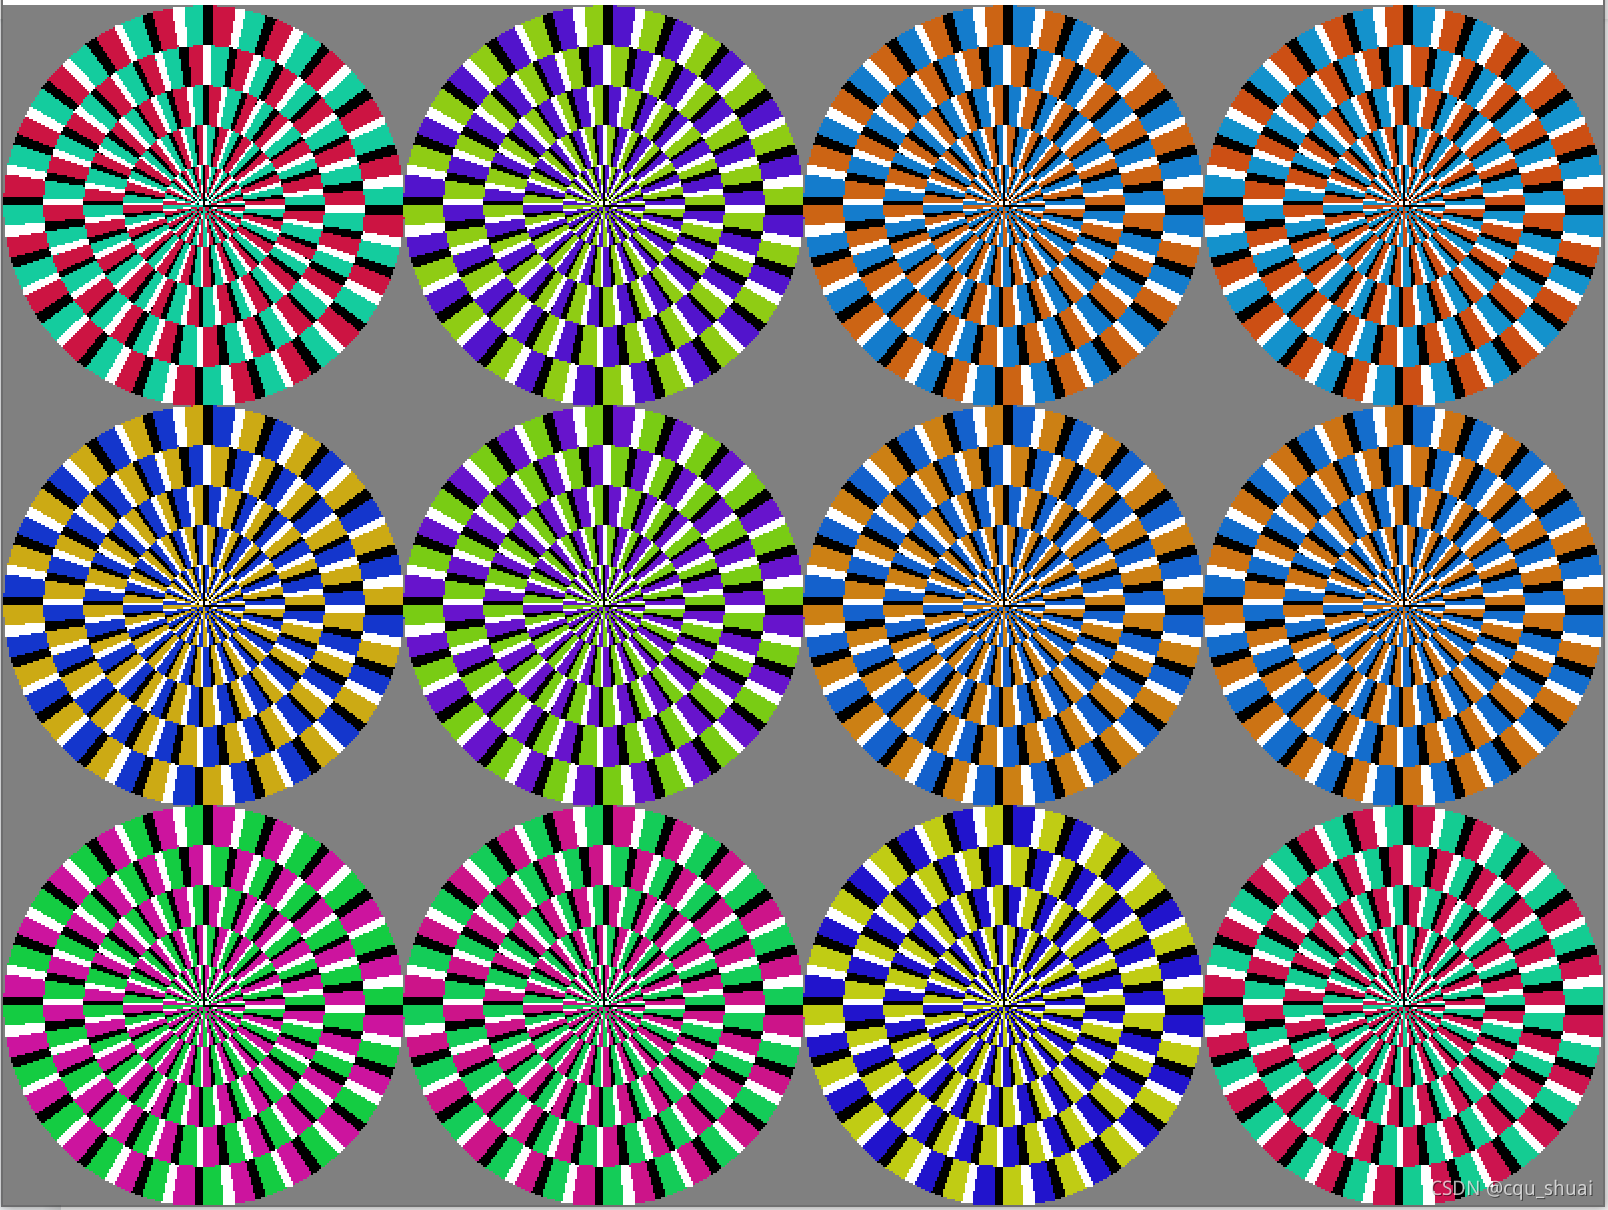
按键切换效果
利用while循环和_getch()函数,可以实现每次按键后,重新生成随机颜色。另外,利用srand()函数对随机函数初始化,避免每次运行的随机颜色都一样
- #include <graphics.h>
- #include <conio.h>
- #include <stdio.h>
- #include <time.h>
-
- int main()
- {
- float PI = 3.14159;
- initgraph(800, 600);
- setbkcolor(RGB(128, 128, 128)); // 设置背景颜色为灰色
- cleardevice();
- srand(time(0)); // 随机种子函数
-
- int centerX, centerY;
- int radius;
- int i;
- float offset;
- float totalOffset; // 不同半径之间的角度偏移量
-
- while (1)
- {
- for (centerX = 100; centerX < 800; centerX += 200)
- {
- for (centerY = 100; centerY < 600; centerY += 200)
- {
- totalOffset = 0; // 同一半径内各组扇形之间的角度偏移量
- float h = rand() % 180; // 随机色调
- COLORREF color1 = HSVtoRGB(h, 0.9, 0.8); // 色调1生成的颜色1
- COLORREF color2 = HSVtoRGB(h + 180, 0.9, 0.8); // 色调2生成的颜色2
- for (radius = 100; radius > 0; radius -= 20)
- {
- int left = centerX - radius;
- int top = centerY - radius;
- int right = centerX + radius;
- int bottom = centerY + radius;
- for (i = 0; i < 20; i++)
- {
- offset = i * PI / 10 + totalOffset;
- setfillcolor(color1); // 青色
- solidpie(left, top, right, bottom, offset, 2 * PI / 60 + offset);
- setfillcolor(RGB(255, 255, 255)); // 白色
- solidpie(left, top, right, bottom, 2 * PI / 60 + offset, 3 * PI / 60 + offset);
- setfillcolor(color2); // 红色
- solidpie(left, top, right, bottom, 3 * PI / 60 + offset, 5 * PI / 60 + offset);
- setfillcolor(RGB(0, 0, 0)); // 黑色
- solidpie(left, top, right, bottom, 5 * PI / 60 + offset, 6 * PI / 60 + offset);
- }
- totalOffset += PI / 20; // 不同半径间角度偏移
- }
- }
- }
- _getch();
- }
- closegraph();
- return 0;
- }
到此这篇关于C++ 实现旋转蛇错觉的详细代码的文章就介绍到这了,更多相关C++旋转蛇内容请搜索w3xue以前的文章或继续浏览下面的相关文章希望大家以后多多支持w3xue!
