GitLab 介绍
GitLab 的历史
- GitLab 最初是一个完全免费的开源软件,根据 MIT 许可证分发。2013 年 7 月,它被分为两个不同的版本 - GitLab CE(社区版)和 GitLab EE(企业版)。GitLab EE 处于受限许可证下,但源代码仍然公开可见,而 GitLab CE 许可模型保持不变。2017 年,GitLab 宣布他们的代码将在 MIT 许可证下完全开源。
为什么使用 GitLab?
Git,GitHub 与 GitLab 的区别
-
Git是一种版本控制系统,是一种工具,用于跟踪修改和从远程资源推送或拉取代码的版本控制。
-
GitHub是一个目前全球最大的基于Git实现的在线代码仓库托管平台,是一个公开的、免费的服务,它要求所有的代码(除非你有一个付费账户)都是公开的。任何人都可以看到你推送到GitHub的代码,并提供改进建议。
-
GitLab是一个基于Git实现的在线代码仓库软件,你可以用GitLab自己搭建一个类似于GitHub一样的仓库,但是GitLab有完善的管理界面和权限控制,一般用于在企业、学校等内部网络搭建Git私服。
-
GitHub和GiLlab两个都是基于Web的Git远程仓库,它们都提供了分享开源项目的平台,为开发团队提供了存储、分享、发布和合作开发项目的中心化云存储的场所。从代码的私有性上来看,GitLab 是一个更好的选择。但是对于开源项目而言,GitHub 依然是代码托管的首选。
特点
-
GitLab免费托管您的(私有)软件项目。
-
GitLab是一个管理 Git 仓库的平台。
-
GitLab提供免费的公共和私有仓库、问题跟踪和维基。
-
GitLab是一个建立在Git之上的用户友好的网络界面层,它提高了使用Git的速度。
-
GitLab提供了自己的 持续集成 (CI)系统来管理项目,并提供用户界面和GitLab的其他功能。
优势
缺点
先决条件
建议使用至少具有以下各项的服务器:
- CPU 4 核是建议的最小核心数,最多支持500个用户。
- 内存 4 GB RAM 是所需的最小内存大小,最多支持500个用户。
GitLab 还要求文件系统准备好用于存储 Git 仓库和各种其它文件。
请注意,如果您使用 NFS(网络文件系统),文件将通过网络传输,根据实现,该网络需要打开端口 111 和 2049
GitLab 架构图

Gitlab组件:
-
repository:代码库,可以是硬盘或 分布式文件系统。
-
Nginx:Web 入口。
-
gitlab-workhorse:轻量级反向代理服务器,可以处理一些大的HTTP请求(磁盘上的 CSS、JS 文件、文件上传下载等),处理 Git Push/Pull 请求,处理到Rails 的连接会反向代理给后端的unicorn(修改由 Rails 发送的响应或发送给 Rails 的请求,管理 Rails 的长期 WebSocket 连接等)。
-
gitlab-shell:用于 SSH 交互,而不是 HTTP。gitlab-shell 通过 Redis 与 Sidekiq 进行通信,并直接或通过 TCP 间接访问 Unicorn。用于处理Git命令和修改authorized keys列表。
-
Unicorn:Gitlab 自身的 Web 服务器(Ruby Web Server),包含了 Gitlab 主进程,负责处理快速/一般任务,与 Redis 一起工作,配置参考:CPU核心数 + 1 = unicorn workers数量。工作内容包括:
-
Redis:缓存每个客户端的sessions和后台队列,负责分发任务。Redis需求的存储空间很小,大约每个用户25KB。
-
Gitaly:后台服务,专门负责访问磁盘以高效处理 gitlab-shell 和 gitlab-workhorse 的git 操作,并缓存耗时操作。所有的 git 操作都通过 Gitaly 处理,并向 GitLab web 应用程序提供一个 API,以从 git(例如 title, branches, tags, other meta data)获取属性,并获取 blob(例如 diffs,commits,files)。
-
Sidekiq:后台核心服务,可以从redis队列中提取作业并对其进行处理。后台作业允许GitLab通过将工作移至后台来提供更快的请求/响应周期。Sidekiq任务需要来自Redis。
-
数据库(PostgreSQL/MySQL):包含以下信息:
-
mail_room:处理邮件请求。回复 GitLab 发出的邮件时,GitLab 会调用此服务处理Sidekiq、Unicorn 和 GitLab-shell 的任务 。
-
logrotate:日志文件管理,切割。
组件操作命令
# nginxgitlab-ctl start|stop|restart|status nginx# unicorngitlab-ctl start|stop|restart|status unicorn# sidekiqgitlab-ctl start|stop|restart|status sidekiq# postgresqlgitlab-ctl start|stop|restart|status postgresql# redisgitlab-ctl start|stop|restart|status redis# gitlabgitlab-ctl start|stop|restart|status|reconfigure# supervisorsystemctl start|stop|restart|status gitlab-runsvdir.service
GitLab部署过程
准备环境
[root@GitServer ~]# cat /etc/redhat-releaseCentOS Linux release 7.9.2009 (Core)[root@GitServer ~]# uname -r3.10.0-1160.el7.x86_64 [root@GitServer ~]# setenforce 0[root@GitServer ~]# sed -i.bak '7s/enforcing/disabled/' /etc/selinux/config [root@GitServer ~]# systemctl stop firewalld[root@GitServer ~]# systemctl status firewalld● firewalld.service - firewalld - dynamic firewall daemon Loaded: loaded (/usr/lib/systemd/system/firewalld.service; disabled; vendor preset: enabled) Active: inactive (dead) Docs: man:firewalld(1)[root@GitServer ~]# firewall-cmd --statenot running
安装
[root@GitLabServer ~]# yum install -y curl policycoreutils-python openssh-server perl postfix wget[root@GitLabServer ~]# wget https://mirrors.tuna.tsinghua.edu.cn/gitlab-ce/yum/el7/gitlab-ce-16.4.2-ce.0.el7.x86_64.rpm[root@GitLabServer ~]# yum localinstall gitlab-ce-16.4.2-ce.0.el7.x86_64.rpmIt looks like GitLab has not been configured yet; skipping the upgrade script. *. *. *** *** ***** ***** .****** ******* ******** ******** ,,,,,,,,,***********,,,,,,,,, ,,,,,,,,,,,*********,,,,,,,,,,, .,,,,,,,,,,,*******,,,,,,,,,,,, ,,,,,,,,,*****,,,,,,,,,. ,,,,,,,****,,,,,, .,,,***,,,, ,*,. _______ __ __ __ / ____(_) /_/ / ____ _/ /_ / / __/ / __/ / / __ `/ __ / /_/ / / /_/ /___/ /_/ / /_/ / \____/_/\__/_____/\__,_/_.___/Thank you for installing GitLab!GitLab was unable to detect a valid hostname for your instance.Please configure a URL for your GitLab instance by setting `external_url`configuration in /etc/gitlab/gitlab.rb file. # 注意:设置external_urlThen, you can start your GitLab instance by running the following command: sudo gitlab-ctl reconfigure # 注意:执行重载配置For a comprehensive list of configuration options please see the Omnibus GitLab readmehttps://gitlab.com/gitlab-org/omnibus-gitlab/blob/master/README.mdHelp us improve the installation experience, let us know how we did with a 1 minute survey:https://gitlab.fra1.qualtrics.com/jfe/form/SV_6kVqZANThUQ1bZb?installation=omnibus&release=16-0 Verifying : gitlab-ce-16.4.2-ce.0.el7.x86_64 1/1Installed: gitlab-ce.x86_64 0:16.4.2-ce.0.el7Complete!
修改GitLab配置
[root@GitLabServer ~]# hostname -I172.16.70.191[root@GitLabServer ~]# cp /etc/gitlab/gitlab.rb /etc/gitlab/gitlab.rb_bak[root@GitLabServer ~]# diff /etc/gitlab/gitlab.rb /etc/gitlab/gitlab.rb_bak32c32# 例如1:external_url 'http://IP' # 默认端口80# 例如2:external_url 'http://IP:PORT'< external_url 'http://172.16.70.191:91' # 修改此行内容, 设置为本机IP:PORT---> external_url 'http://gitlab.example.com'# 重载配置[root@GitLabServer ~]# gitlab-ctl reconfigure
可选设置
# 启动ssh服务&设置为开机启动systemctl enable sshd && sudo systemctl start sshd# 设置postfix开机自启,并启动,postfix支持gitlab发信功能systemctl enable postfix && systemctl start postfix# 如系统防火墙是开启状态,则需设置允许策略firewall-cmd --permanent --add-service=httpfirewall-cmd --permanent --add-service=httpsfirewall-cmd --zone=public --add-port=PORT/tcp --permanentsystemctl reload firewalld
查看GitLab版本信息
[root@GitLabServer ~]# gitlab-rake gitlab:env:infoSystem informationSystem:Current User: gitUsing RVM: noRuby Version: 3.0.6p216Gem Version: 3.4.19Bundler Version:2.4.19Rake Version: 13.0.6Redis Version: 7.0.13Sidekiq Version:6.5.7Go Version: unknownGitLab informationVersion: 16.4.2Revision: 67c88353b76Directory: /opt/gitlab/embedded/service/gitlab-railsDB Adapter: PostgreSQLDB Version: 13.11URL: http://172.16.70.191:91HTTP Clone URL: http://172.16.70.191:91/some-group/some-project.gitSSH Clone URL: git@172.16.70.191:some-group/some-project.gitUsing LDAP: noUsing Omniauth: yesOmniauth Providers:GitLab ShellVersion: 14.28.0Repository storages:- default: unix:/var/opt/gitlab/gitaly/gitaly.socketGitLab Shell path: /opt/gitlab/embedded/service/gitlab-shellGitaly- default Address: unix:/var/opt/gitlab/gitaly/gitaly.socket- default Version: 16.4.2- default Git Version: 2.42.0
Gitlab目录结构
/opt/gitlab/ # 主目录/etc/gitlab/ # 放置配置文件/var/opt/gitlab/ # 各个组件/var/log/gitlab/ # 放置日志文件/var/opt/gitlab/git-data/repositories # 数据库的地址 /var/opt/gitlab/postgresql/data # gitlab组和项目的地址/etc/gitlab/gitlab.rb # gitlab配置文件
端口信息
[root@GitLabServer ~]# netstat -ntplActive Internet connections (only servers)Proto Recv-Q Send-Q Local Address Foreign Address State PID/Program nametcp 0 0 127.0.0.1:9229 0.0.0.0:* LISTEN 2637/gitlab-workhortcp 0 0 127.0.0.1:9168 0.0.0.0:* LISTEN 2653/rubytcp 0 0 127.0.0.1:8080 0.0.0.0:* LISTEN 2222/puma 6.3.1 (untcp 0 0 0.0.0.0:91 0.0.0.0:* LISTEN 2330/nginx: master # 对应前面设置external_url PORTtcp 0 0 127.0.0.1:8082 0.0.0.0:* LISTEN 2252/sidekiq_exporttcp 0 0 127.0.0.1:9236 0.0.0.0:* LISTEN 2599/gitalytcp 0 0 127.0.0.1:8150 0.0.0.0:* LISTEN 2626/gitlab-kastcp 0 0 0.0.0.0:22 0.0.0.0:* LISTEN 1270/sshdtcp 0 0 127.0.0.1:8151 0.0.0.0:* LISTEN 2626/gitlab-kastcp 0 0 127.0.0.1:8153 0.0.0.0:* LISTEN 2626/gitlab-kastcp 0 0 127.0.0.1:25 0.0.0.0:* LISTEN 875/mastertcp 0 0 127.0.0.1:8154 0.0.0.0:* LISTEN 2626/gitlab-kastcp 0 0 127.0.0.1:8155 0.0.0.0:* LISTEN 2626/gitlab-kastcp 0 0 127.0.0.1:8092 0.0.0.0:* LISTEN 2250/sidekiq 6.5.7tcp 0 0 0.0.0.0:8060 0.0.0.0:* LISTEN 2330/nginx: mastertcp 0 0 127.0.0.1:9121 0.0.0.0:* LISTEN 2655/redis_exportertcp 0 0 127.0.0.1:9090 0.0.0.0:* LISTEN 2662/prometheustcp 0 0 127.0.0.1:9187 0.0.0.0:* LISTEN 2688/postgres_exportcp 0 0 127.0.0.1:9093 0.0.0.0:* LISTEN 2678/alertmanagertcp 0 0 127.0.0.1:9100 0.0.0.0:* LISTEN 2647/node_exportertcp6 0 0 ::1:9168 :::* LISTEN 2653/rubytcp6 0 0 :::22 :::* LISTEN 1270/sshdtcp6 0 0 ::1:25 :::* LISTEN 875/mastertcp6 0 0 :::9094 :::* LISTEN 2678/alertmanager
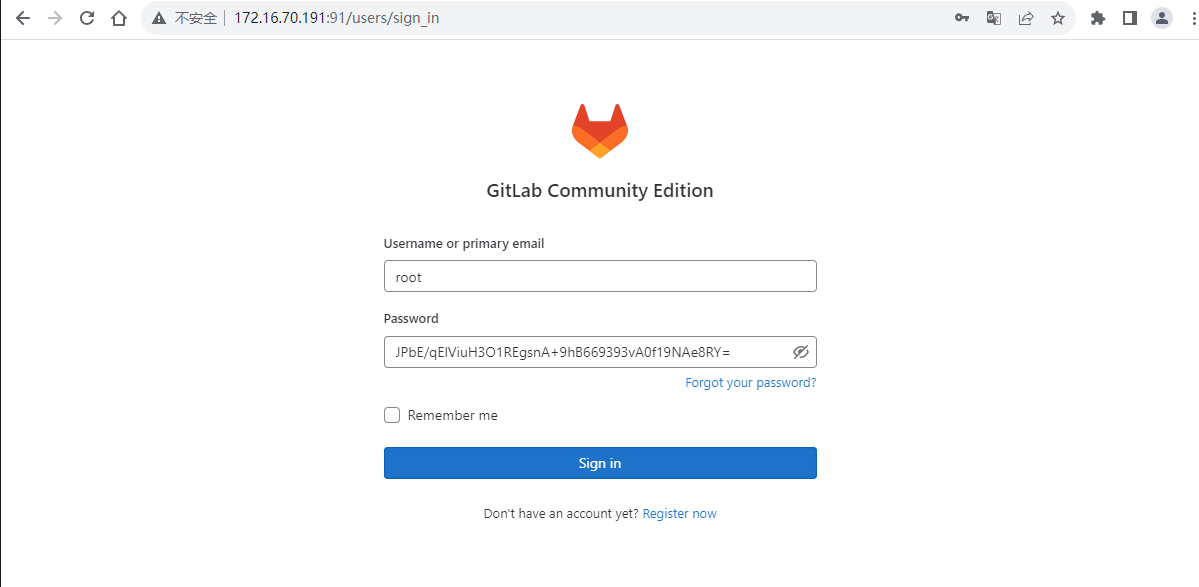
GitLab 密码
获取初始登录密码,默认登录账号:root
设置初始密码:GitLab 14.0 开始引入。
默认情况下,Linux 软件包安装会自动为初始管理员用户账号 (root) 生成密码,并将其存储到 /etc/gitlab/initial_root_password 至少 24 小时。出于安全原因,24 小时后,此文件会被第一次 gitlab-ctl reconfigure 自动删除。
[root@GitLabServer ~]# grep Password: /etc/gitlab/initial_root_passwordPassword: JPbE/qElViuH3O1REgsnA+9hB669393vA0f19NAe8RY=

设置简体中文


其他设置
禁用注册
默认情况下,任何访问您的极狐GitLab 域名的用户都可以注册一个账户。对于运行面向公众的极狐GitLab 实例的客户,如果您不希望公众用户注册账户,我们强烈建议您考虑禁用新注册。
要禁用注册:在左侧边栏中,选择 搜索或转到。选择 管理中心。选择 设置 > 通用。展开 注册限制。清除 已启用注册功能 复选框,然后选择 保存修改。
重置/修改root密码
使用Rake任务:GitLab 13.9 开始引入。
密码长度设置为最少8个字符,且必须符合复杂性要求。
[root@GitLabServer ~]# gitlab-rake "gitlab:password:reset[root]"Enter password: # 输入新密码Confirm password: # 再次输入Password successfully updated for user with username root.
防止新用户创建顶级群组
# 编辑 /etc/gitlab/gitlab.rb 并添加以下行:gitlab_rails['gitlab_default_can_create_group'] = falsegitlab-ctl reconfiguregitlab-ctl restart
防止用户更改其用户名
默认情况下,新用户可以更改他们的用户名。要禁用您的用户更改其用户名的能力:
编辑 /etc/gitlab/gitlab.rb 并添加以下行:gitlab_rails['gitlab_username_changing_enabled'] = falsegitlab-ctl reconfiguregitlab-ctl restart
