gRPC是一个高性能、开源、通用的远程过程调用(RPC)框架,由Google推出。
它基于HTTP/2协议标准设计开发,默认采用Protocol Buffers数据序列化协议,支持多种开发语言。
在gRPC中,客户端可以像调用本地对象一样直接调用另一台不同的机器上服务端应用的方法,使得您能够更容易地创建分布式应用和服务。
gRPC支持多种语言,并提供了丰富的接口和库,以及简单易用的API,方便开发者进行快速开发和部署。
同时,gRPC的底层框架处理了所有强制严格的服务契约、数据序列化、网络通讯、服务认证、访问控制、服务观测等等通常有关联的复杂性,使得开发者可以更加专注于业务逻辑的实现。
1. 为什么用 gRPC
我平时用的最多的语言其实是golang,但是,做数据分析相关的项目,不太可能绕开python那些优秀的库。
于是,就想把数据分析的核心部分用python来实现,并用gRPC接口的方式提供出来。
其他的业务部分,仍然用原先的语言来实现。
gRPC相比于http REST,性能和安全上更加有保障,而且对主流的开发语言都支持的很好,不用担心与其他语言开发的业务系统对接的问题。
最后,gRPC虽然接口的定义和实现比http REST更复杂,但是,它提供了方便的命令行工具,
可以根据protocol buf的定义自动生成对应语言的类型定义,以及stub相关的代码等等。
实际开发时,一般只要关注接口的定义和业务功能的实现即可,gRPC框架需要的代码可以通过命令行工具生成。
2. 安装
对于Python语言,安装gRPC框架本身和对应的命令行工具即可:
$ pip install grpcio # gRPC框架$ pip install grpcio-tools # gRPC命令行工具
3. 开发步骤
开发一个gPRC接口一般分为4个步骤:
- 使用
[protocal buf](https://protobuf.dev/overview)定义服务接口
- 通过命令行生成
client和server的模板代码
- 实现server端代码(具体业务功能)
- 实现client端代码(具体业务功能)
下面通过一个示例演示gRPC接口的开发步骤。
这个示例来自最近做量化分析时的一个指标(MACD)的实现,
为了简化示例,下面实现MACD指标的业务功能部分是虚拟的,不是实际的计算方法。
3.1. 定义服务接口
接口主要定义方法,参数,返回值。
syntax = "proto3";package idc;// 定义服务,也就是对外提供的功能service Indicator { rpc GetMACD(MACDRequest) returns (MACDReply) {}}// 请求的参数message MACDRequest { string start_date = 1; // 交易开始时间 string end_date = 2; // 交易结束时间}// 返回值中每个对象的详细内容message MACDData { string date = 1; // 交易时间 float open = 2; // 开盘价 float close = 3; // 收盘价 float high = 4; // 最高价 float low = 5; // 最低价 float macd = 6; // macd指标值}// 返回的内容,是一个数组message MACDReply { repeated MACDData macd = 1;}
3.2. 生成模板代码
在grpc_sample目录下,执行命令:
python -m grpc_tools.protoc -I./protos --python_out=. --pyi_out=. --grpc_python_out=. ./protos/indicator.proto
生成后文件结构如下:
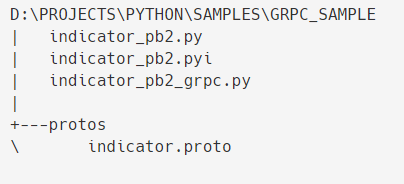
生成了3个文件:
indicator_pb2.py:proto文件定义的消息类indicator_pb2_grpc.py:服务端和客户端的模板代码indicator_pb2.pyi:不是必须的,为了能让mypy等工具校验代码类型是否正确
3.3. server端代码
通过继承indicator_pb2_grpc.py文件中的服务类,实现服务端功能。
# -*- coding: utf-8 -*-from concurrent import futuresimport grpcimport indicator_pb2import indicator_pb2_grpcclass Indicator(indicator_pb2_grpc.IndicatorServicer): def GetMACD(self, request, context): macd = [] for i in range(1, 5): data = indicator_pb2.MACDData( date=request.start_date, open=i * 1.1, close=i * 2.1, high=i * 3.1, low=i * 0.1, macd=i * 2.5, ) macd.append(data) return indicator_pb2.MACDReply(macd=macd)def serve(): port = "50051" server = grpc.server(futures.ThreadPoolExecutor(max_workers=10)) indicator_pb2_grpc.add_IndicatorServicer_to_server(Indicator(), server) server.add_insecure_port("[::]:" + port) server.start() print("Server started, listening on " + port) server.wait_for_termination()if __name__ == "__main__": serve()
服务端需要实现proto文件中定义接口的具体业务功能。
3.4. client端代码
使用indicator_pb2_grpc.py文件中的Stub来调用服务端的代码。
# -*- coding: utf-8 -*-import grpcimport indicator_pb2import indicator_pb2_grpcdef run(): with grpc.insecure_channel("localhost:50051") as channel: stub = indicator_pb2_grpc.IndicatorStub(channel) response = stub.GetMACD( indicator_pb2.MACDRequest( start_date="2023-01-01", end_date="2023-12-31", ) ) print("indicator client received: ") print(response)if __name__ == "__main__": run()
3.5. 运行效果
加入客户端和服务端代码后,最后的文件结构如下:

测试时,先启动服务:
$ python.exe .\idc_server.pyServer started, listening on 50051
然后启动客户端看效果:
$ python.exe .\idc_client.pyindicator client received:macd { date: "2023-01-01" open: 1.1 close: 2.1 high: 3.1 low: 0.1 macd: 2.5}macd { date: "2023-01-01" open: 2.2 close: 4.2 high: 6.2 low: 0.2 macd: 5}macd { date: "2023-01-01" open: 3.3 close: 6.3 high: 9.3 low: 0.3 macd: 7.5}macd { date: "2023-01-01" open: 4.4 close: 8.4 high: 12.4 low: 0.4 macd: 10}
4. 传输文件/图片
除了上面的返回列表数据的接口比较常用以外,我用的比较多的还有一种接口就是返回图片。
将使用python的matplotlib等库生成的分析结果图片提供给其他系统使用。
开发的步骤和上面是一样的。
4.1. 定义服务接口
定义文件相关的服务接口,文件的部分需要加上stream关键字,也就是流式数据。
syntax = "proto3";package idc;// 定义服务,也就是对外提供的功能service IndicatorGraph { rpc GetMACDGraph(MACDGraphRequest) returns (stream MACDGraphReply) {}}// 请求的参数message MACDGraphRequest { string start_date = 1; // 交易开始时间 string end_date = 2; // 交易结束时间}// 返回的内容,是一个图片message MACDGraphReply { bytes macd_chunk = 1;}
注意,定义服务接口GetMACDGraph时,返回值MACDGraphReply前面加上stream关键字。
返回的文件内容是 bytes 二进制类型。
4.2. 生成模板代码
执行命令:
python -m grpc_tools.protoc -I./protos --python_out=. --pyi_out=. --grpc_python_out=. ./protos/indicator_graph.proto
生成3个文件:
- indicator_graph_pb2.py
- indicator_graph_pb2.pyi
- indicator_graph_pb2_grpc.py
4.3. server端代码
首先,生成一个MACD指标的图片(macd.png)。

然后,服务端的代码主要就是按块读取这个文件并返回。
import grpcimport indicator_graph_pb2import indicator_graph_pb2_grpcclass IndicatorGraph(indicator_graph_pb2_grpc.IndicatorGraphServicer): def GetMACDGraph(self, request, context): chunk_size = 1024 with open("./macd.png", mode="rb") as f: while True: chunk = f.read(chunk_size) if not chunk: return response = indicator_graph_pb2.MACDGraphReply(macd_chunk=chunk) yield response
4.4. client端代码
客户端的代码也要相应修改,不再是一次性接受请求的结果,而是循环接受,直至结束。
import grpcimport indicator_graph_pb2import indicator_graph_pb2_grpcdef run(): with grpc.insecure_channel("localhost:50051") as channel: stub = indicator_graph_pb2_grpc.IndicatorGraphStub(channel) print("indicator client received: ") with open("./received_macd.png", mode="wb") as f: for response in stub.GetMACDGraph( indicator_graph_pb2.MACDGraphRequest( start_date="2023-01-01", end_date="2023-12-31", ) ): f.write(response.macd_chunk)
客户端接收完成后,图片保存在 received_macd.png 中。
实际执行后,图片可以正常保存并显示。
5. 回顾
本篇是最近用gPRC封装python数据分析相关业务过程中一些简单的总结。
这里没有对gPRC做系统的介绍,它的官方文档已经非常完善,而且文档中针对主流编程语言的示例也都有。
本篇笔记中的两个示例虽然简单,却是我用的最多的两种情况:
一种是返回对象数组:是为了将pandas,numpy等库处理后的数据返回出来供其他系统使用;
一种是返回文件/图片:是为了将matplotlib,seaborn等库生成的分析图片返回出来供其他系统使用。
目前gPRC对我最大的好处是,它提供了一种稳定可靠的,将python强大的数据分析能力结合到其他系统中的能力。
